 |
This article is need of a clean-up. You can help out Rec Room Wiki by re-organizing parts of the article, checking grammar and spelling, and doing other helpful things to correct the article.
|
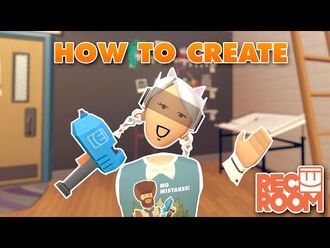
| “ | [T]he Maker Pen is a major update to the "3D Pen". It can now do a whole lot more! The Maker Pen has its own watch-style menu [...] that lets you pick from a much wider variety of colors [...] and shapes [...] and do useful stuff like clone those shapes! [...] The Maker Pen can do a lot, so it may take a while to learn the tips and tricks.
|
” |
— Rec Room Inc., Update Page
|

How To Rec Room - New Maker Pen Menu!
YouTube video by Rec Room Inc.
How to create in Rec Room using the Maker Pen!
YouTube video by Rec Room Inc.

Maker Pen 101 - How to build a book in Rec Room
YouTube video by Rec Room Inc.

How to use the new Snap, Move, and Scale tools!
YouTube tutorial by Rec Room Inc.
About[]
The maker pen is one of the tools that are available in the Backpack Menu of the Watch Menu. A simplified version of the maker pen is used in 3D Charades. The maker pen replaced the former 3D Pen and can be used to create objects that consist of primitive 3D shapes (spheres, boxes, etc.) of various colors, as well as spawn in props from all of the #RecRoomOriginal Rooms. It can also be used to program interactive environments and to spawn and configure built-in objects.
For tutorials about how to use the maker pen, see Rec Room's support page "Custom Rooms Tools and Tutorials", their YouTube playlist "Community Tutorials (Creative Tools)", and their Creator Programs.
For examples of what you can do with the maker pen, have a look at Featured Rooms and the Maker Pen Community.
Maker Pen in 3D Charades[]

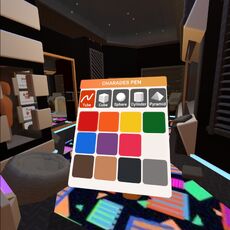
Maker pen menu in 3D Charades.
The default maker pen in 3D Charades (which is also available in the Palette) is a simplified, red version of the maker pen that allows you to create tubes, boxes, spheres, cylinders, and pyramids in various colors, which you can select in the maker pen menu. No other functions of the maker pen are available for this version.
Apart from the limited functions, the main difference between the Charades version and the full version of the maker pen is that you don't need to press "Done Editing" with the Charades version; instead you turn the most recently created shapes into a sticky maker pen object by picking up any of these shapes.
The rest of this page is only concerned with the full version of the maker pen.
Basic Functions[]
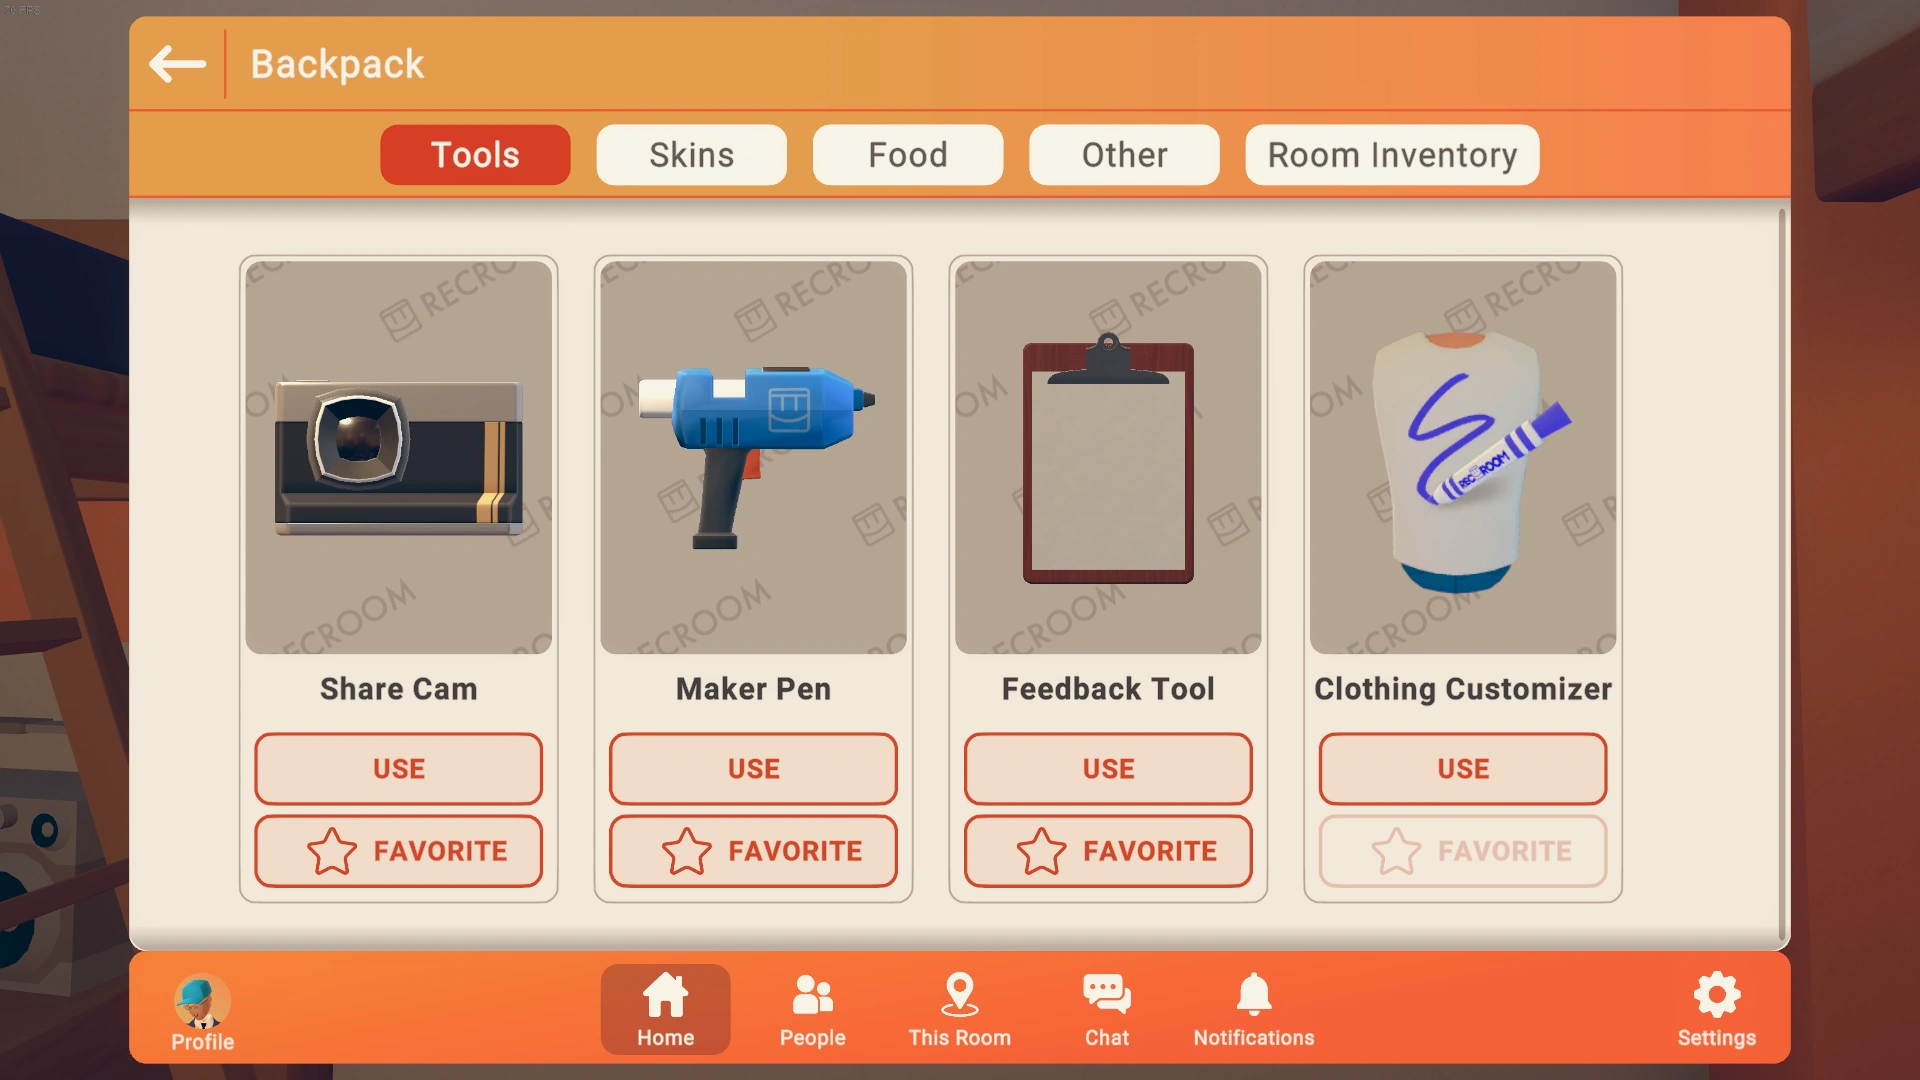

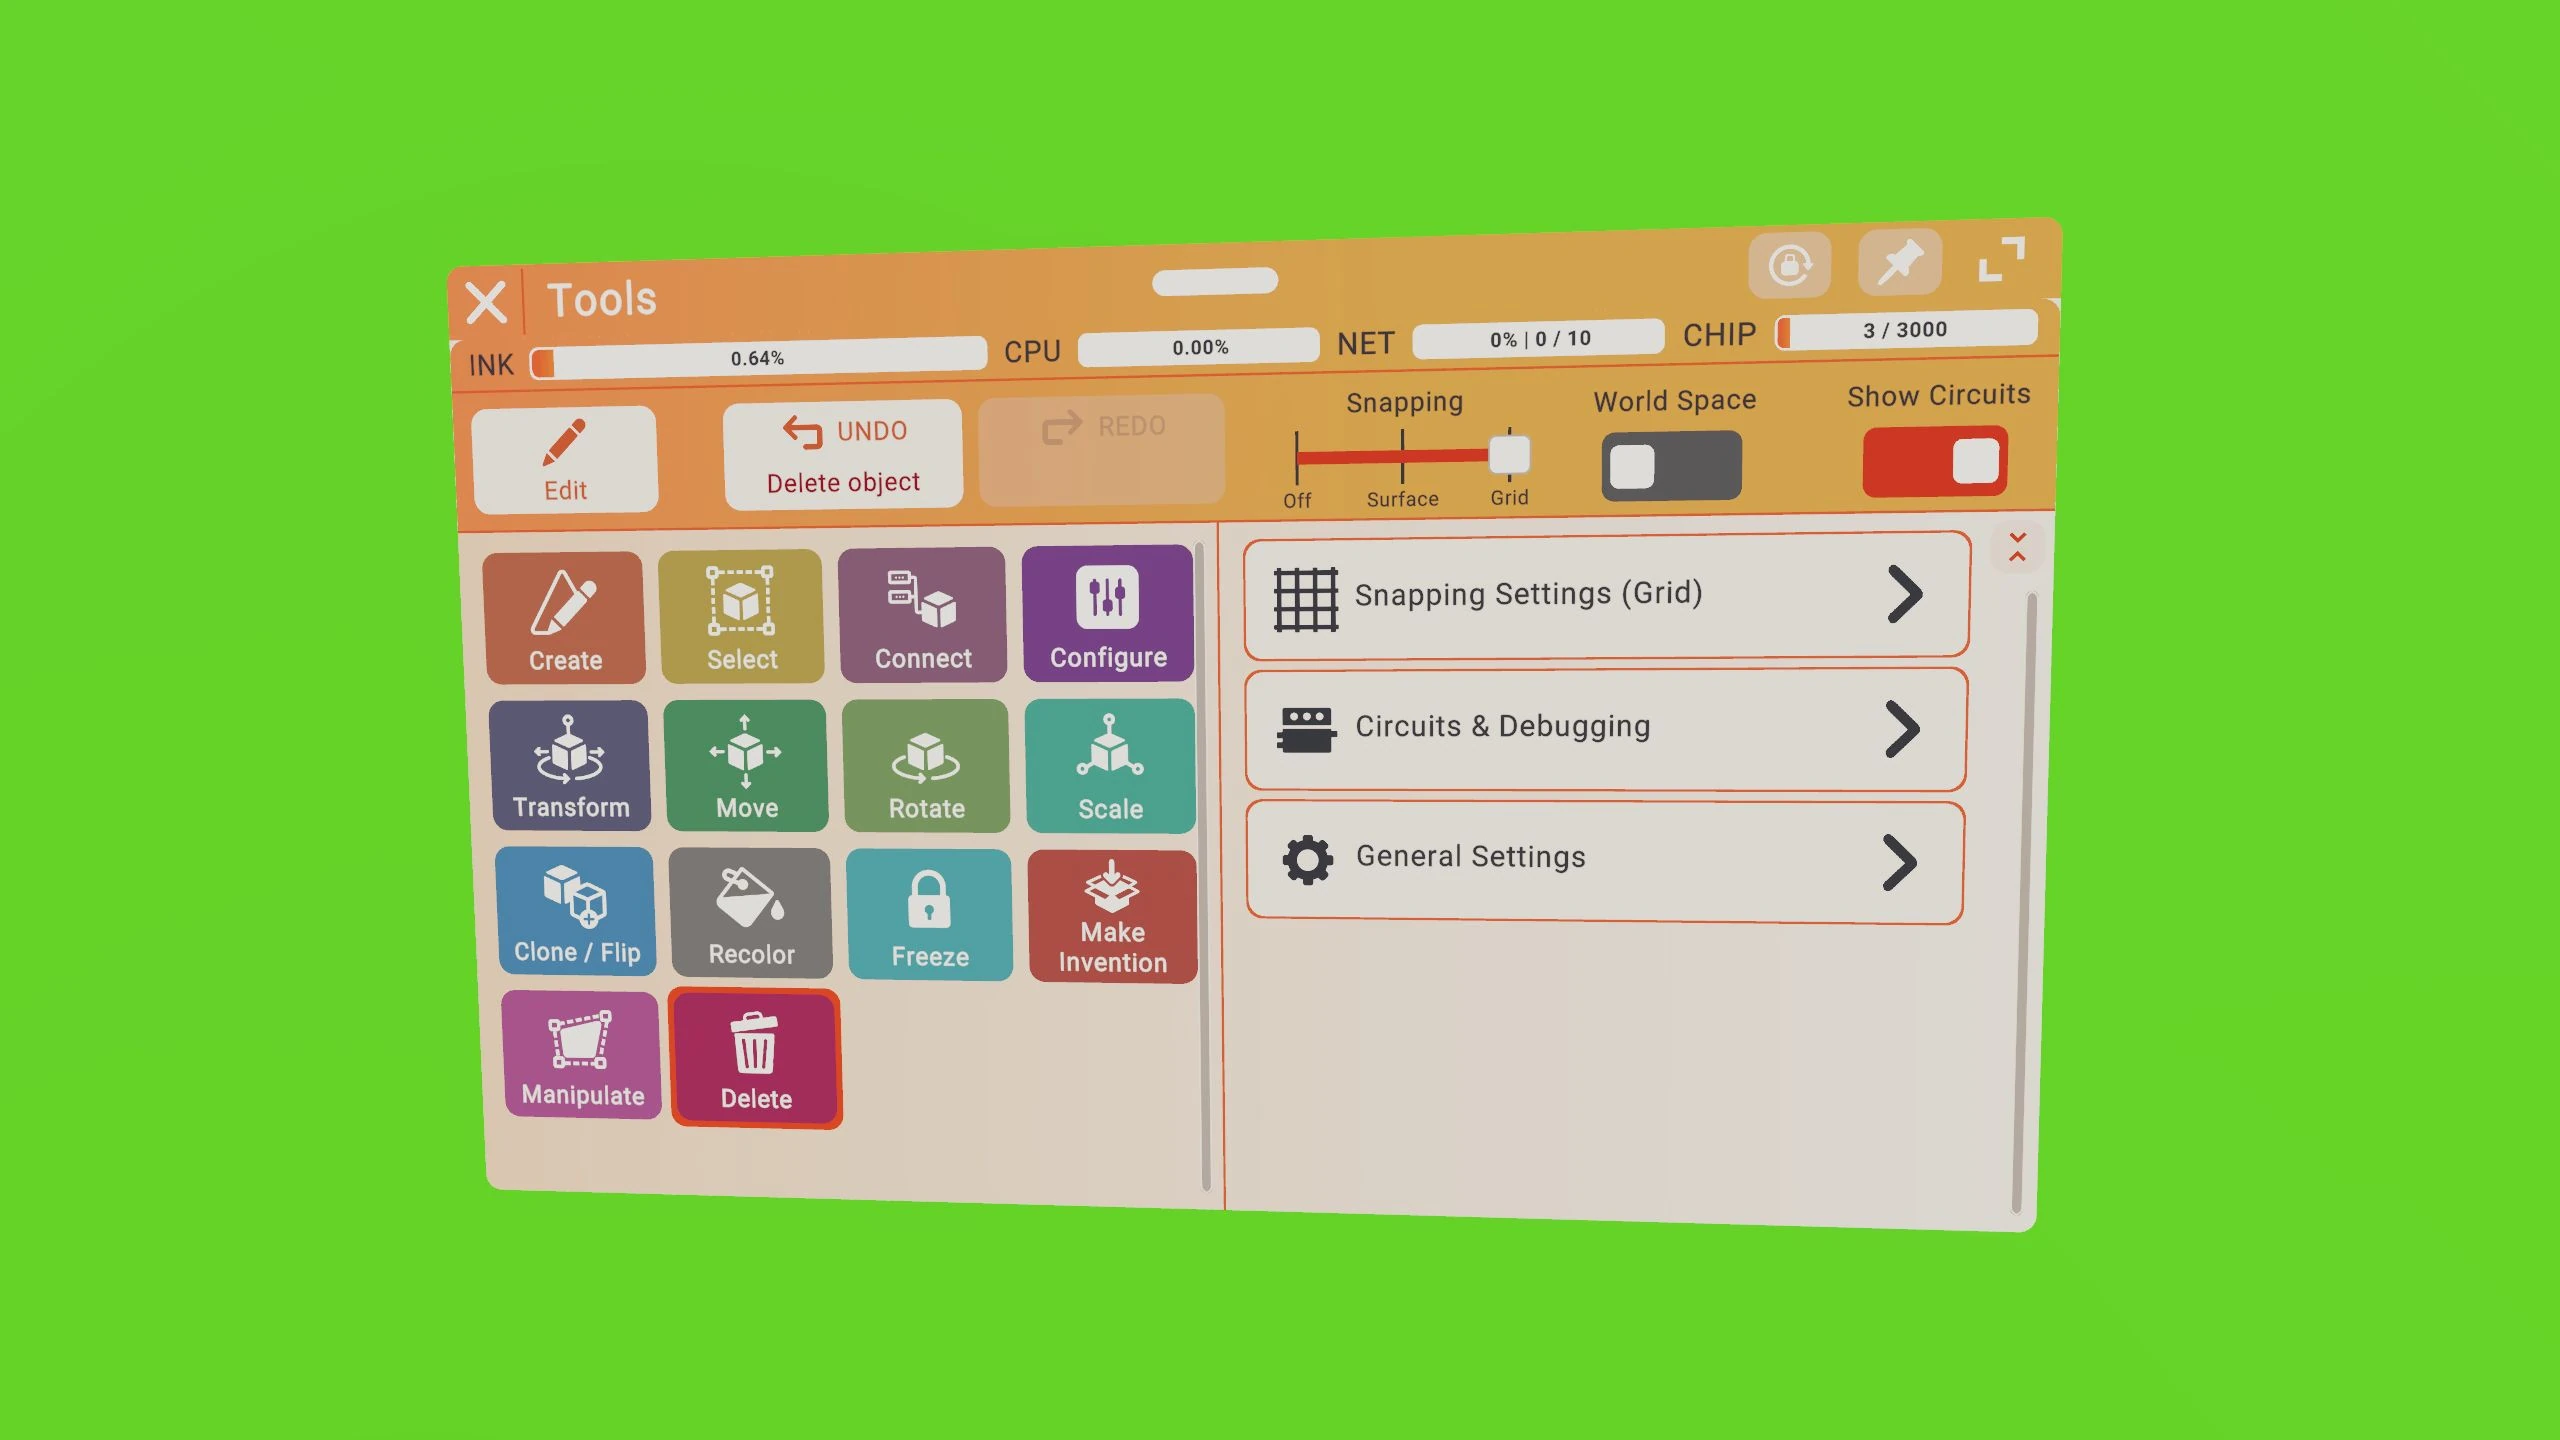
Tools tab of the Backpack menu.
Starting Using the Maker Pen[]
To use the maker pen, you need retrieve it from your Backpack Menu by tapping the “Use” button next to the maker pen in the Tools tab. If it has been set as your “Favorite”, it can be retrieved by reaching over your shoulder and pulling the trigger, much like the map in Rec Royale. Players on Junior accounts cannot use the maker pen outside of their Dorm Room.
Stopping Using the Maker Pen[]
To stop using the maker pen, just drop it like any other object; i.e., with the "drop" button. If you drop it over your back it will despawn. It will also despawn once it exits a bubble of an approximate 3 metre radius around the player. There is also a button on the bottom left of your maker pen menu that says “Done Editing”. When you press this button, it will do the same thing as dropping your maker pen, but it will stay in your hand.
If you want to save your maker pen creations, you can either make them in a Custom Room and save the room, or save them as inventions.


Maker pen and maker pen menu on top of it.
Opening and Using the Maker Pen Menu[]
To open the maker pen menu in VR mode, you have to rotate the maker pen such that you look directly at its top. Sometimes this doesn't work and you have to drop the maker pen and pick it up again to make the menu appear.
You can select buttons and tabs of the maker pen menu in the same way as in the Watch Menu; i.e., by using your other controller to tap on the menu.
Expert Tip: Lock the Position of the Menu
- You can lock the position of the maker pen menu in the same way as with the Watch Menu, i.e., with the "drop" button.
In Screen Mode, to open the maker pen menu, you have to hold a maker pen and open the maker pen menu via the Shortcuts menu (the icons in the top bar on iOS). (In Screen Mode, the maker pen menu that opens by rotating the maker pen is not functional.)
Opening and Closing the Palette[]

Palette and maker pen
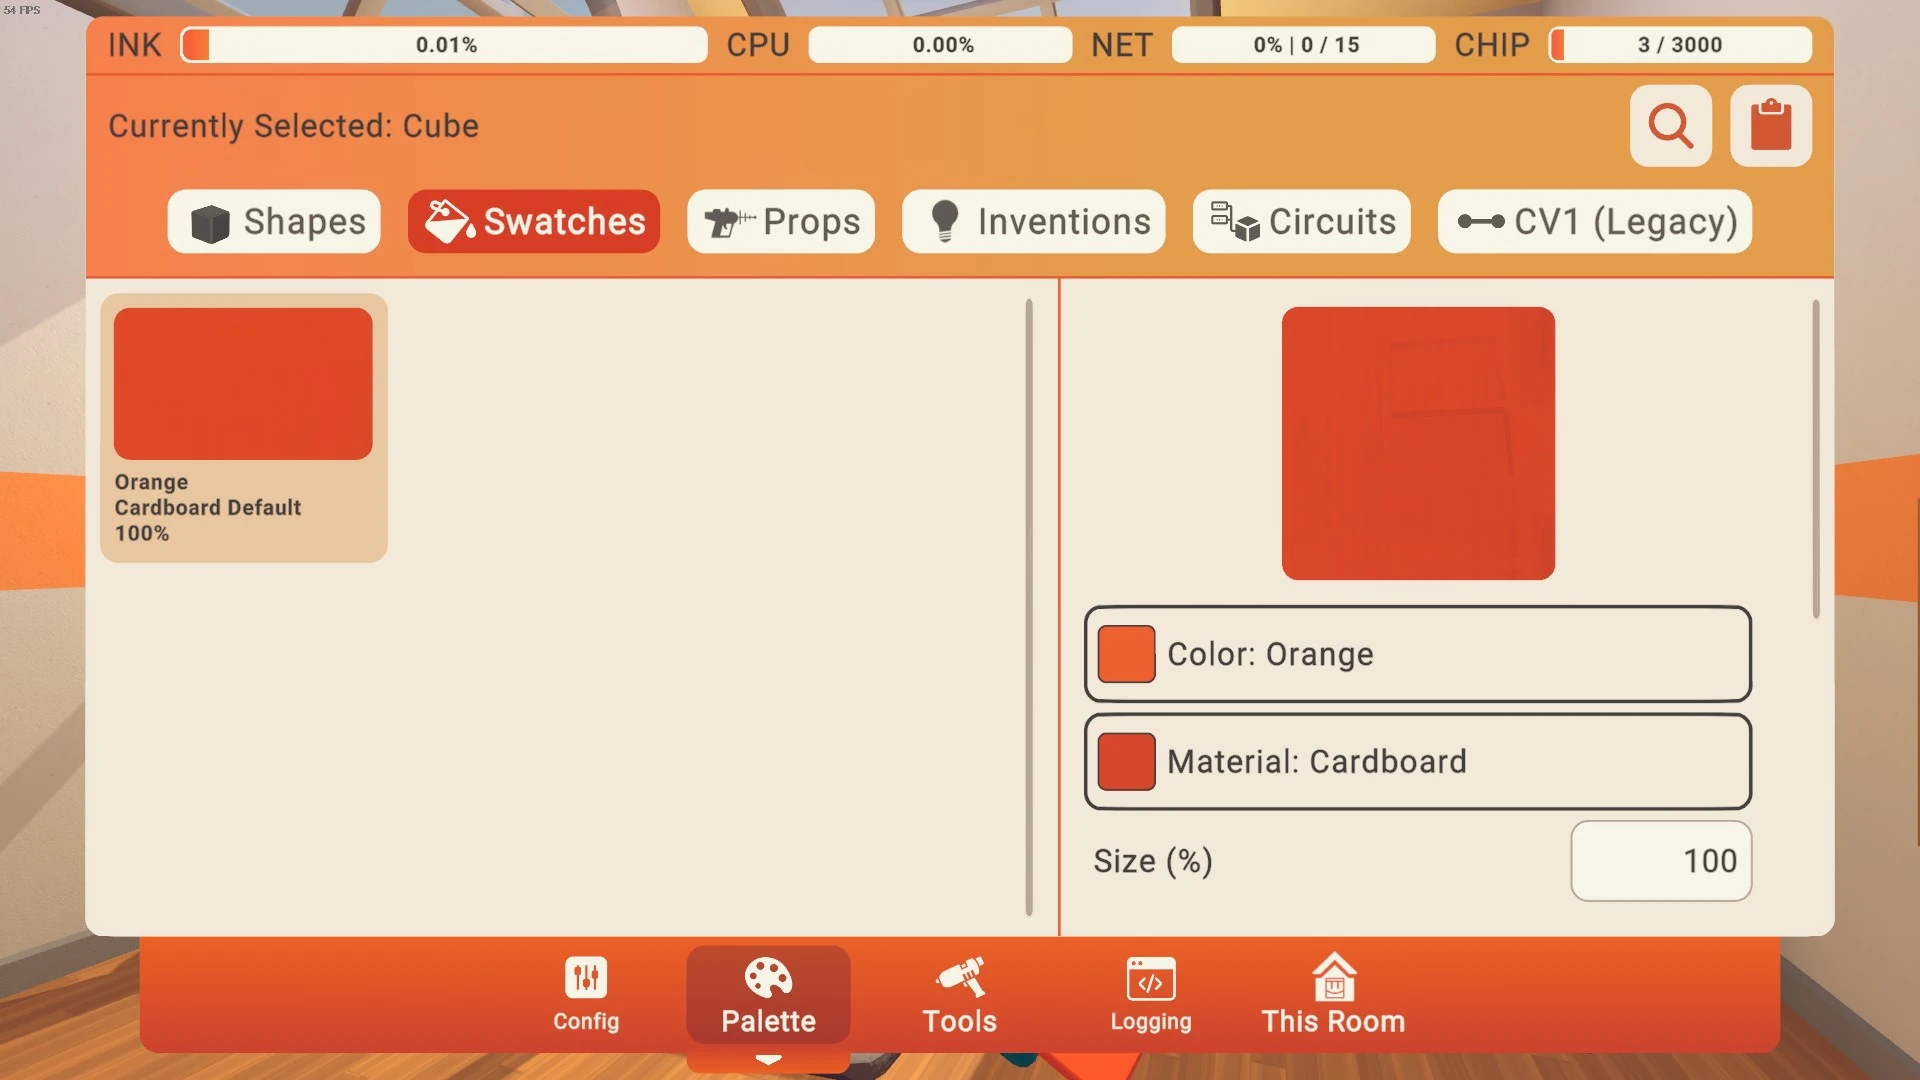
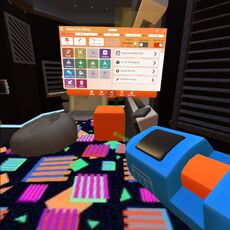
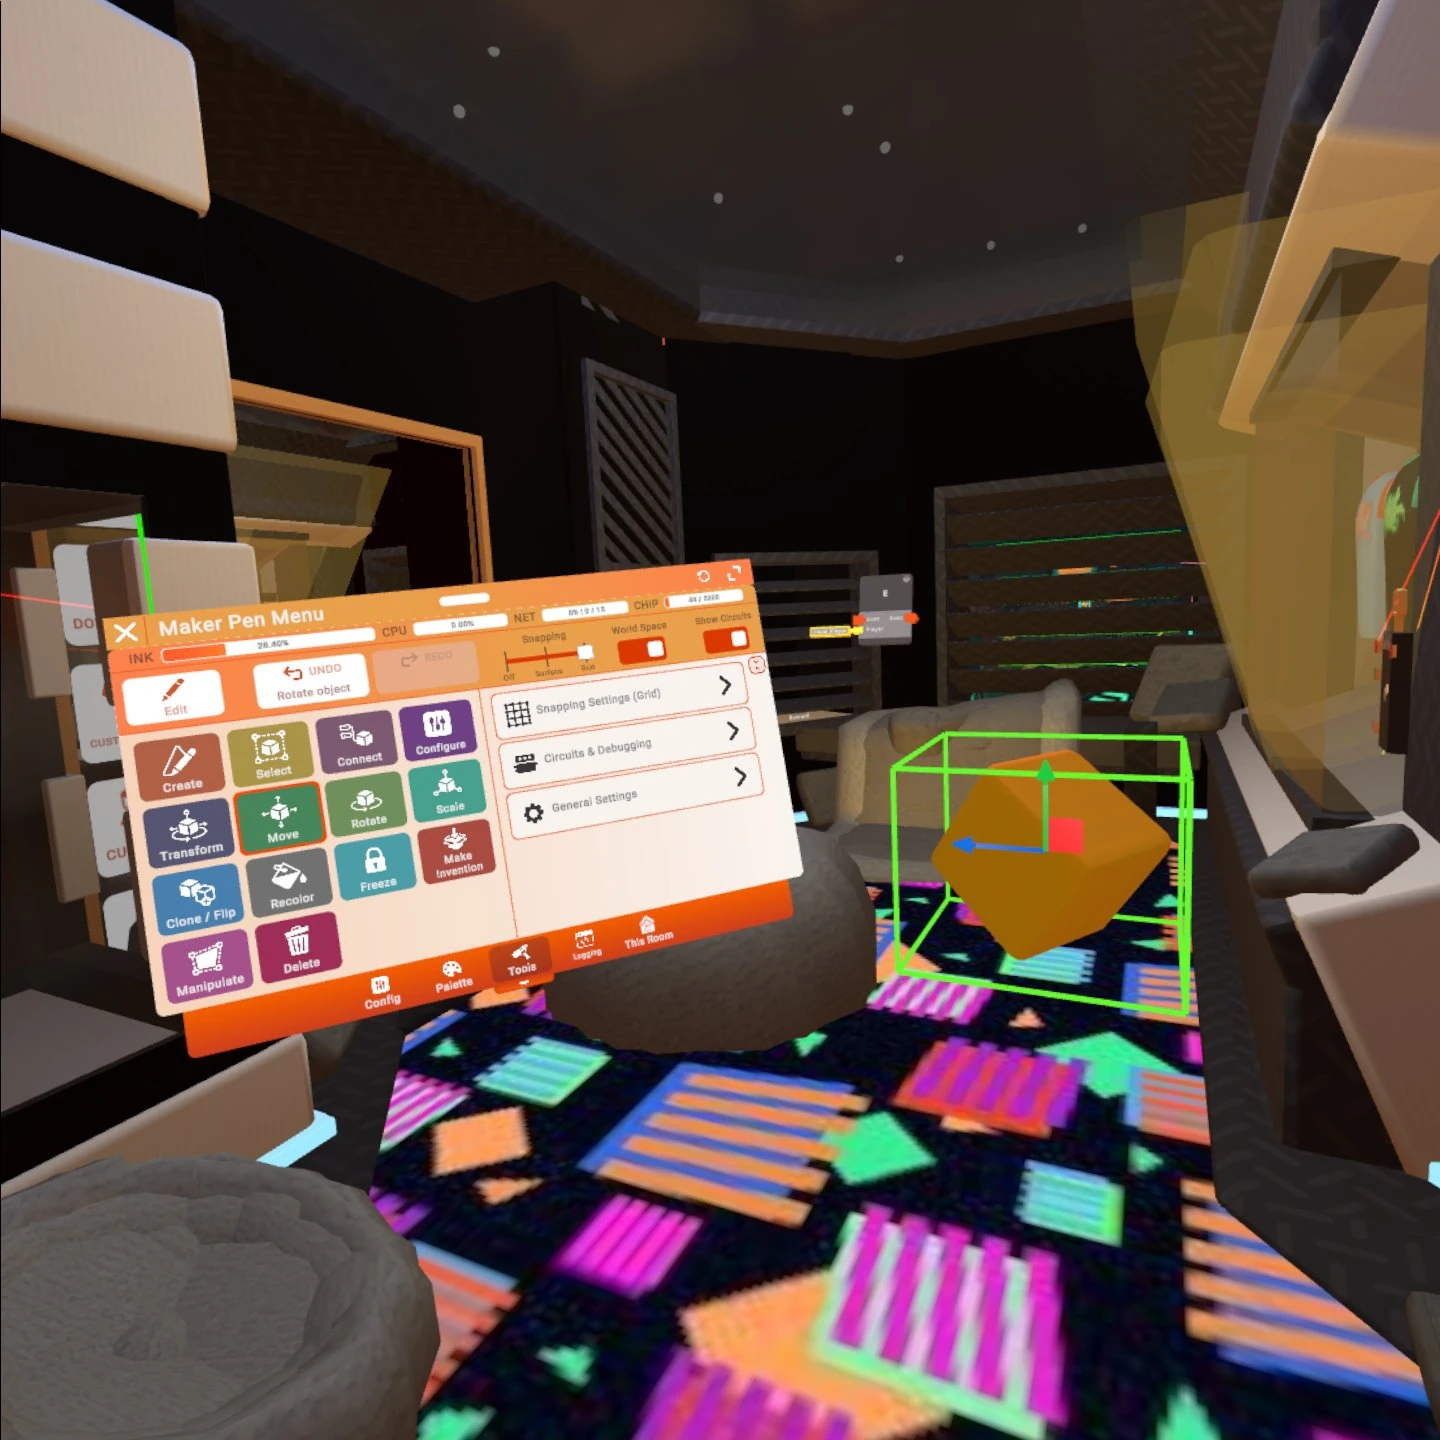
The top-left button of the maker pen menu opens the Palette, which is used to select shapes, colors, gadgets, props, as well as settings of the maker pen and settings of other objects.
The Palette can be closed with the same button on the maker pen menu, with the top-right button on the Palette, or by dropping the maker pen.
Creating and Editing Shapes[]
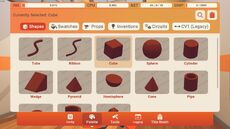
Shapes (and Materials) tab of the Palette
In the "Shapes" tab of the Palette, you can select one of several types of shapes. To create a shape of the selected type, pull and hold the trigger of the maker pen and physically move the maker pen in space. Release the trigger to fix the shape. Pull the trigger again to create additional shapes. To create shapes of different types, materials, or colors, select a different shape type, material, or color on the Palette, and pull the trigger again.
With your free hand, you can pick up shapes to rotate and move them. While an object is in your free hand, arrows will appear on various points of the shape, allowing you to Manipulate the shape.
Creating a shape activates the "Edit mode" of the maker pen, which is indicated by the grayed-out "Edit" button. In "Edit mode", the maker pen affects individual shapes.
Expert Tip: Large Shapes
- You cannot teleport while creating a shape, but you can fly and walk or swipe-rotate your view each time you reach the edge of your tracking space, which allows you to create very large shapes. This is preferable to scaling with the Scale button if you want to create objects of specific sizes.
Creating and Editing Maker Pen Objects[]
Maker pen menu in "Edit mode": the "Edit" button is grayed out and the "Done Editing" button is available.
Maker pen menu in "Object mode": the "Edit" button is available but the "Done Editing" button is grayed out.
Maker pen objects are sets of shapes that form a rigid body; i.e., their shapes move together (unless the maker pen object is in "Edit mode"). Note that the shapes of a maker pen object do not have to touch each other: they may be arbitrarily far apart from each other.
You create a maker pen object simply by creating one or more shapes. Initially, the new maker pen object is in "Edit mode"; i.e., you can add more shapes to the maker pen object and edit its individual shapes as described above. Also, no one else can manipulate the shapes that you are editing.
To stop "Edit mode" (and activate "Object mode"), tap "Done Editing" at the bottom of the maker pen menu or drop the maker pen. Once "Edit mode" is stopped for a maker pen object, all its shapes move together. If you now create a new shape, that shape will be part of a new maker pen object without affecting the other maker pen object that is no longer in "Edit mode". To activate "Edit mode" for a maker pen object again, use the Edit button. As mentioned, this button is not available if the maker pen is already in "Edit mode" for another object. In this case, you have to stop "Edit mode" for the other object by tapping "Done Editing" first and then use the Edit button to activate "Edit mode" for the object that you want to edit.
In "Object mode", the maker pen affects objects (instead of shapes). Here, objects include maker pen objects as well as gadgets and props from the Palette.
Expert Tip: How to Visualize and Edit the Center of a Maker Pen Object
- Every object has an internal center position. This internal center position isn't used very often (most tools use the center of the bounding box when they need some kind of "center" or pivot point of an object). However, in some cases the internal center position is important, e.g., when respawning an object with an Object Respawner or when spawning an Invention. To see the internal center position of an object just respawn the object with an Object Respawner. The respawner has a small white point it its center, which is where the internal center position of the object is immediately after respawning. To "move" the internal center position of a maker pen object, go into "Edit mode" of the respawned maker pen object, use the Select mode to select all shapes of the maker pen object, and Move them such that the white point of the respawner is where you want the internal center position to be.
Expert Tip: Reasons You Cannot Teleport onto a Maker Pen Object
- The most common reasons why you cannot teleport onto a maker pen object are: 1) there is not enough space above the object for your avatar (try to duck or sit down), 2) the object is in "physical" or "decoration" mode (see next section), 3) the object is in "Edit mode", 4) someone holds the object in their hand, and 5) there are bugs that prevent you from teleporting onto the object.
Modes of Maker Pen Objects[]
First some words about two important modes of the maker pen: "Edit mode" and "Object mode". By default the maker pen is in "Object mode". Creating a new shape (and thereby a new maker pen object) or using the Edit button activates "Edit mode" for the maker pen and one maker pen object. Tapping the "Done Editing" button or dropping the maker pen, stops "Edit mode" and activates "Object mode". Thus, the maker pen is only in "Edit mode" if there is a maker pen object that is also in "Edit mode". At any time, there can only be one maker pen object that is in "Edit mode".

The 2 "Configure Object" pages in the Palette for maker pen objects.
Apart from "Edit mode", there are several other modes of maker pen objects. Most of them are selected with the Configure mode.
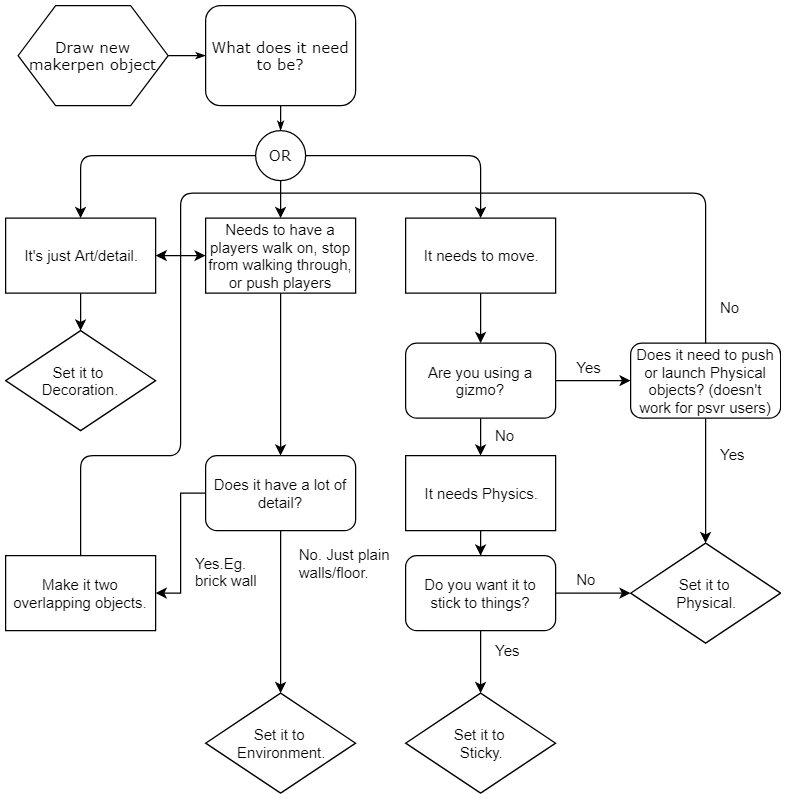
- Decoration: In this mode, a maker pen object can be grabbed and moved by all players, but has no physics, and will not collide with anything.
- Environment: This is the default mode for maker pen objects that are not in "Edit mode". These objects can be grabbed and moved by all players, but cannot move with physics.
- Physical: In this mode, a maker pen object can be grabbed and moved by all players and it has physical properties, in particular a mass and an initial velocity 0 m/s. However, a physical object has no physical properties while it is selected (see Select), frozen (see Freeze), being edited (see Edit), or held by another player. The center of gravity of a physical maker pen object is determined by the positions and(!) sizes of its shapes. You cannot teleport onto physical objects. Physical objects have code to push themselves out of places they shouldn’t be, such as players, other objects, and the environment. If you‘re looking to stick an object to someone/something, use sticky mode (see below).
- Sticky: In this mode, an object can be grabbed and moved by all players, and has physical properties, in particular a mass and an initial velocity of 0 m/s. What separates sticky objects from physical objects is that sticky objects can be stuck to other things, including players, props, the environment, and other Maker Pen Objects.
These basic modes can then be modified in a couple of ways:
- Frozen: In this mode, an object cannot be grabbed nor edited by anyone. You have to unfreeze the object with the Freeze mode (or by double-tapping with the Select mode) to edit it again.
- Selected: Maker pen objects can be selected with the Select, Configure, Freeze, Move, Rotate, and Scale modes. Selected objects are highlighted with a yellowish color. Selected objects will not react to physics, and cannot be grabbed by other players.
- Stuck to another object: A Sticky Maker Pen object can be stuck to other objects (including other maker pen objects, the ground, players, and props from the Palette) by releasing it when in contact with another object. In order to stick a Maker Pen object to another object, it is usually best to hold both objects with your hands. If a Maker Pen object is stuck to another object, it will temporarily lose its physical properties and follow the movements of the other object. This also means that it no longer reacts to collisions with other objects. Sticking Maker Pen objects to other Maker Pen objects is discussed in more detail below.
- Is Grabbable: Most modes of objects can be modified by the "Is Grabbable" checkbox. If this checkbox is unchecked, players who don't hold a Maker Pen cannot grab them, and the “Is Climbable” checkbox can be checked.
- Is Climbable: When this box is checked, objects can be climbed in a way identical to the rope walls in Stunt Runner. In order for this box to be able to be checked, “Is Grabbable” must be unchecked. If this box is checked, “Is Grabbable” cannot be checked. It should be noted that currently (09/09/19), there is a bug preventing all sides of an object from being climbable. Therefore, if you are making a room involving climbing, you should experiment with the Rotate tool to determine which face(s) of an object are climbable.
- Hidden during games: Objects with the activated "Hidden during games" checkbox disappear when a game is started and reappear when the game is ended. (Usually, this requires a Game Rules chip.)
- Held by a player: Technically, this is yet another mode in which maker pen objects temporarily behave in a special way, for example, they are unaffected by physics.
.png)
Limited Maker Pen "Ink"[]

How to Rec Room - Saving Maker Pen ink when building your rooms!
YouTube tutorial by Rec Room Inc.
There is a limited amount of shapes, objects, gadgets, and props that you can create with a maker pen in a room. The amount of remaining shapes is represented by the length of the ink/glue stick at the top of the maker pen and the bar at the top of the Palette. The available amount of shapes depends on several factors: other props in the room, the types of shapes, the length of ribbons and tubes, the number of maker pen objects, the modes of maker pen objects, etc. Note that the available amount of shapes neither depends on the size of shapes (except for the length of tubes and ribbons) nor on whether objects are frozen.
More information about maker pen ink is available in a developer blog post.
Expert Tip: How to Increase the Amount of "Ink"
- Put as many shapes into each maker pen object as possible - possibly by merging the shapes of multiple maker pen objects. (Each maker pen object costs some ink, but each shape that is part of a maker pen object is much(!) cheaper than a new maker pen object.)
- Use "decoration" mode mode for as many maker pen objects as possible. (Decoration objects cost about half the ink of environment objects.)
- Avoid setting objects to “physical“ or "sticky" mode.
- Avoid long tubes and ribbons. (Long boxes, cylinders, or ellipsoids are much cheaper.)
- Assemble Chips in Circuit Boards.
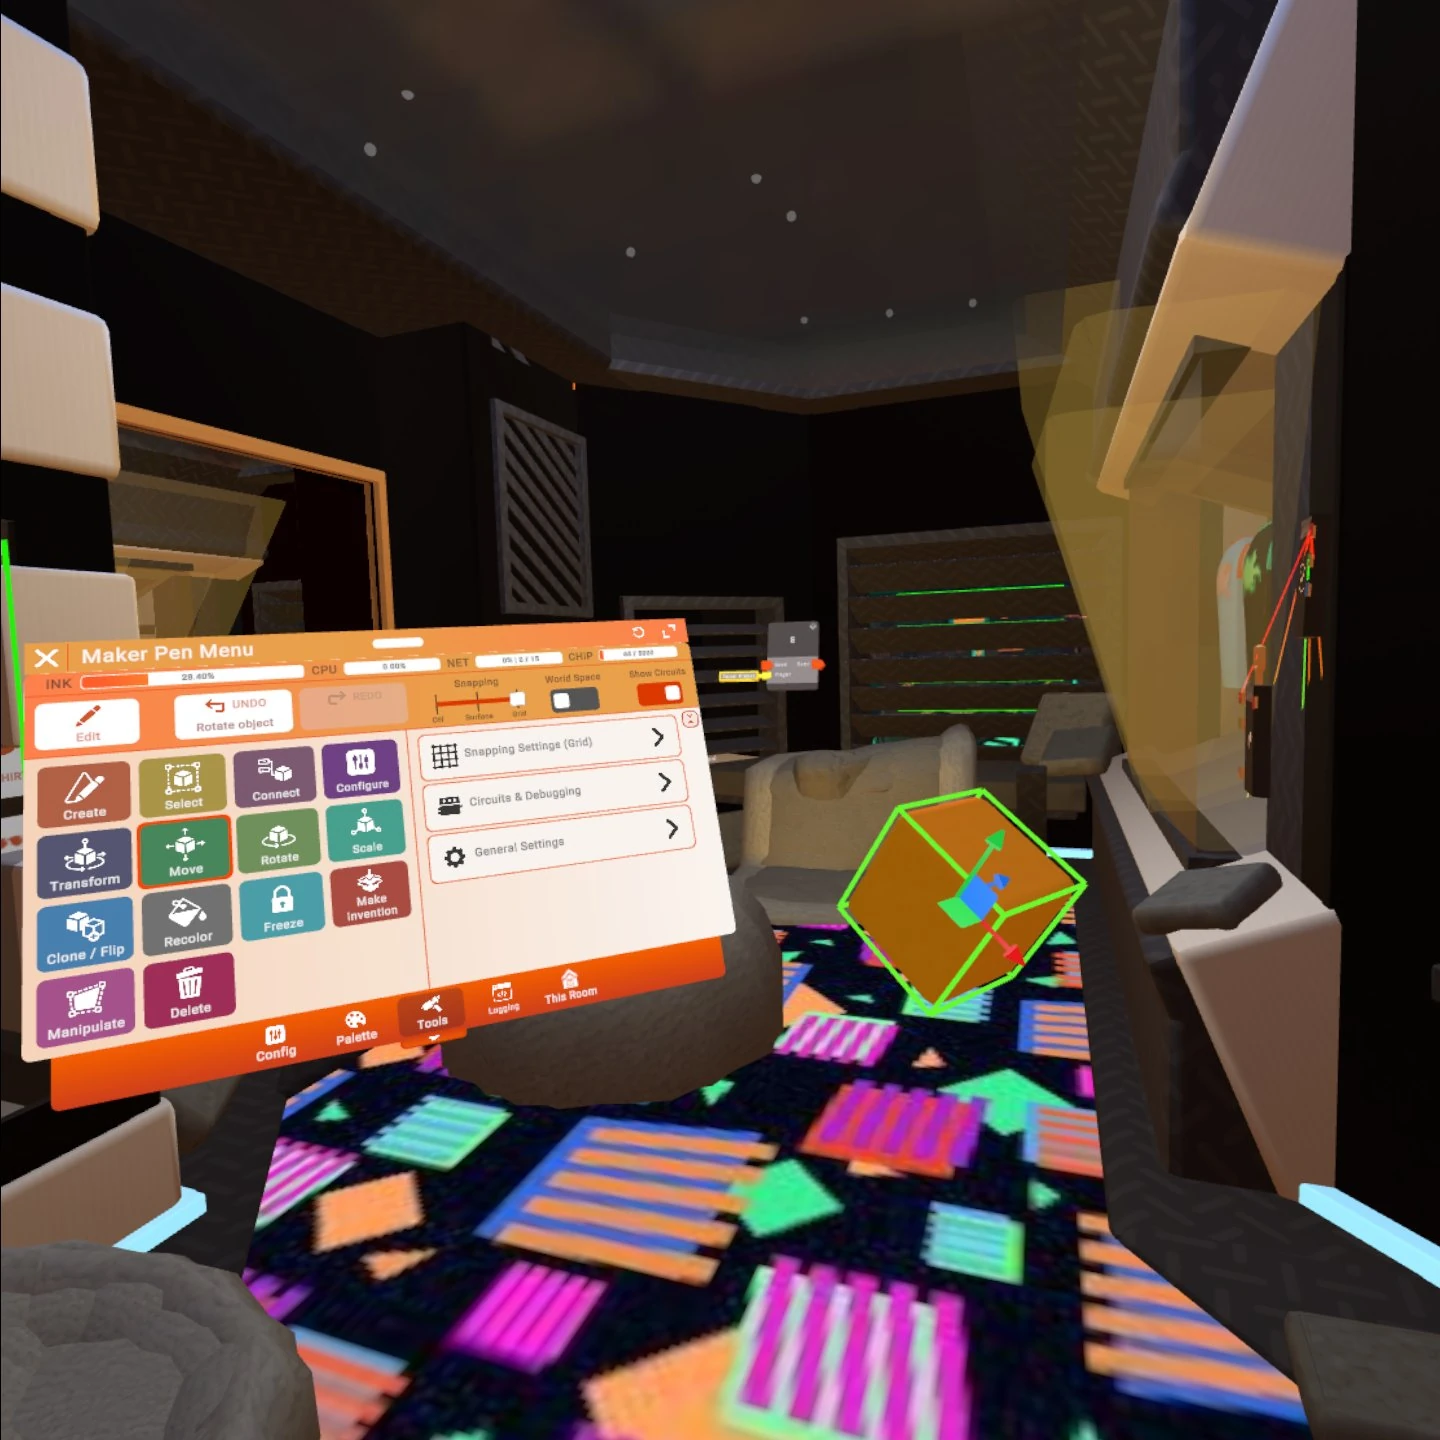
Maker Pen Menu[]
Maker pen menu in "Object mode": the "Edit" button is available but the "Done Editing" button is grayed out.
To open the maker pen menu, you have to rotate the maker pen such that you look directly at its top. You can select buttons of the maker pen menu in the same way as in the Watch Menu; i.e., by using your other controller to tap on the menu.
Note that there are two versions of the maker pen menu: "Edit mode" (the maker pen affects shapes) and "Object mode" (the maker pen affects objects: maker pen objects, gadgets, and props).
Open Palette and Close Palette[]
The top-left button of the maker pen menu opens and closes the Palette.

The orange box is being moved with the maker pen. The activated Align checkbox helps to align the faces of the orange and gray boxes.
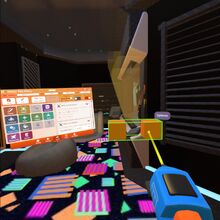
Align[]
The Align checkbox is the left-most checkbox of 3 checkboxes at the top of the maker pen menu. (The icon shows a circle on top of a rectangle.) It activates a mode that helps to align the faces of the bounding box of an object that is being moved to the faces of cubes (and other objects) that are close to it. (This is useful, for example, to place objects flat on a floor even if the floor is not aligned with the snap grid.) The mode can be configured in the "Settings" tab of the Palette to also align edges of objects (in addition to aligning faces).
Snap[]
The Snap checkbox is the center checkbox of 3 checkboxes at the top of the maker pen menu. It activates move and rotation snapping, which is configured in the Settings" tab of the Palette.
World Space[]
The World Space checkbox is the right-most checkbox of 3 checkboxes at the top of the maker pen menu. It specifies that the Move, Rotate, and Scale modes move/rotate/scale along or around axes in world space (i.e. the global axes of a room) instead of the local axes of a shape or object. The local axes of shapes are aligned with the boxes that are used when creating them. For maker pen objects that consist of multiple shapes, the local axes are determined by the first shape of the object (even if that no longer exists).
Edit[]
Maker pen menu in "Edit mode": the "Done" button is available.
The "Edit" button allows you to select a maker pen object or Circuit Board by pointing a ray at it and pulling the trigger. This activates "Edit mode" for the object and the maker pen. "Edit mode" allows you to manipulate the shapes of an object and add new shapes, or edit Chips of a Circuit Board. You can exit "Edit mode" by tapping the "Done Editing" button.
If “Fade world in edit mode” is checked in the "Settings" tab of the Palette (on by default), everything except that which you are editing will be faded in to white by a noticeable amount. This makes it a lot simpler to understand when an object is in "Edit mode."
Create[]
The "Create" button activates a mode to create a new instance of the currently selected shape, gadget, or prop from the Palette. This mode is automatically activated when you select a new shape, gadget, or prop in the Palette. To position the new shape or object, move your controller before you release the trigger.
Select[]
The "Select" button activates a mode that allows you to select and unselect shapes (when they are in "Edit mode") and objects (in "Object mode"). The group of selected shapes or objects are moved, rotated, cloned, deleted, and scaled together. You can include a shape or object in this group of selected shapes/objects by tapping the "Select" button, pointing with the yellow ray from the maker pen at a shape or object, and pulling the trigger. Pulling the trigger again while you point the green ray at the same shape or object will unselect it.
You can select multiple shapes or objects by selecting one and then instead of releasing the trigger dragging the laser ray over additional shapes or objects. To this end, a "select sphere" will appear at the tip of the laser ray, the size of which can be set in the "Settings" tab of the Palette. Shape or objects that are touched by this select sphere will be selected. Analogously, you can unselect multiple shapes or objects with one swipe.
You can unselect all selected shapes or objects by double-tapping (with the trigger) any of the selected shapes or objects. Double-tapping one of them again, selects the previous selection again. Switching to Edit mode or dropping the maker pen will also deselect your selection.
Double tapping a frozen object in "Select" mode unfreezes it.

The context menu with "Options" appearing when multiple objects have been selected. Point with the maker pen at the label and pull the trigger to open the context menu.
Selecting objects or shapes will usually bring up a "Options" label. Pointing at this label and pulling the trigger will open a context menu that depends on the selection. Currently, the following functions are accessible in this way:
Merge Shapes[]
You can merge the shapes of two or more maker pen objects into one maker pen object by selecting the objects; then pointing at the "Options" label that appears next to the selected objects and then pulling the trigger. This will open a menu that allows you to choose "Merge Shapes". One important reason to merge the shapes of multiple maker pen objects into one maker pen object is to save ink.
Split Shapes[]
You can split a maker pen object in "Edit mode" by selecting one or more shapes that you want to split into a new maker pen object; then pointing at the "Options" label that appears next to the selected shapes and then pulling the trigger. This will open a context menu that allows you to choose "Split Shapes".
Eyedropper[]
Eyedropper can copy swatches to your swatches tab. Note that it sometimes doesn't automatically equip them, but it will be saved there in your maker pen forever until you delete it.
Copy[]
If you select one or many objects and select "Copy", it will be saved to your clipboard in "tools", exactly the same!
Center Pivot To Selection(?)[]
Centers the pivot point of an object to the very centre of an object.
Create Circuit Board[]
To create a Circuit Board, select two or more Chips; open the context menu ("Options"), and select "Create Circuit Board". This will create a new circuit board that contains the selected chips.
Unpack Circuit Board[]
To unpack a Circuit Board, select a circuit board, open the context menu ("Options"), and select "Unpack Circuit Board". This will remove the circuit board and leave behind the chips within.
Merge Circuit Board[]
To merge chips into a Circuit Board, select one or more Chips, as well as a circuit board, open the context menu ("Options"), and select "Merge Circuit Board". This will pack the selected chip(s) into the circuit board.
Add State[]
The Select mode can be used to create a new State chip: select a State Machine chip or a State chip; point at the "Options" label that appears next to it and then pull the trigger. This will open a context menu that allows you to choose "Add State". Selecting this menu point will create a new State chip and a transition from the selected chip to the new chip.
Select Entire Invention[]
To select an entire Invention that has been spawned in a room, select any object of it, point at the "Options" label that appears next to it and then pull the trigger. This will open a context menu that allows you to choose "Select entire invention". Selecting this menu point will select the entire invention that the selected object is part of.
Move[]
Axes for moving in object/local space (unchecked "World Space" checkbox)

Axes for moving in world/global space (checked "World Space" checkbox)
The "Move" button activates a mode that allows you to move shapes (when they are in "Edit mode") and objects (in "Object mode"). After activating it, you can point the green ray from the maker pen at any unfrozen object, pull the trigger, and move the maker pen to move the shape or object. This works even if the object is far away.
There are two move modes:
- If you pull the trigger and hold it, you can drag the shape or object around freely.
- If you "tap" the object with the trigger, three axes will appear. By pointing at one of the axes and pulling the trigger, you can move the object along that axis. Whether the axes are world space axes or the local axes of the object is determined by the "World Space" checkbox.
If "Don't rotate while moving" is activated in the "Settings" tab of the Palette, then this mode does not rotate shapes and objects; otherwise the rotation is around the center of the maker pen. The size of the snap grid is specified in the "Settings" tab of the Palette.
Rotate[]

Circles for choosing the rotation axis (from the "World Space" axes).
The "Rotate" button activates a mode that allows you to rotate shapes (when they are in "Edit mode") or objects (in "Object mode"). After activating it, you can point the green ray from the maker pen at any unfrozen object, pull the trigger, and rotate the maker pen to rotate the object around its center. This works even if the object is far away.
There are three rotation modes:
- If you pull the trigger without moving your controller at the same time, you can then freely rotate the object.
- If you pull the trigger and move the controller at the same time, the system chooses an axis (not always the one that you might want) and limits the rotation to that axis.
- If you "tap" the object with the trigger, four circles appear. You can point at any of the four circles and pull the trigger to rotate around the corresponding axis. Whether the axes are world space axes or the local axes of the object is determined by the "World Space" checkbox.
If snapping is activated, rotation angles are snapped to discrete angles as specified in the "Settings" tab of the Palette.
Scale[]
The "Scale" button activates a mode that allows you to scale shapes (when they are in "Edit mode") or any objects including props (in "Object mode"). After activating it, you can point the white ray from the maker pen at any unfrozen object, pull the trigger, and move the maker pen to scale the shape or object (uniformly in all directions).
For shapes, you can limit the scaling to one axis (similar to the function of "Manipulate") by "tapping" the object with the trigger. Whether the axes are world space axes or the local axes of the object is determined by the "World Space" checkbox.
Expert Tip: Scaling Gizmos
- Scaled down Piston and Rotator Gizmos will have movement speed scaled accordingly, e.g. if a rotator gizmo is scaled down to half of its regular size, its rotation speed will be equal to half of the input RPM.
Connect[]
The "Connect" button activates a mode that allows you to connect the pins of gadgets and props that have pins to construct complex Circuits. After activating it, you can point the ray from the maker pen at a pin, pull the trigger, move the ray to the pin that you want to connect, and then release the trigger. You can disconnect a connection by following a similar process starting with an input pin: i.e., point at the input pin (on the left side of a chip or object), pull the trigger, point away from any pins, and release the trigger.
You can connect input pins of the same color of multiple chips to a single output pin by selecting the chips that you want to connect and connecting one of the input pins to the output pin.
The Connect mode provides you with information about current values on most pins. (You can change the constant input value of most input pins with the Configure mode.) When just pointing ("hovering") with the ray from the maker pen at many pins for about 2 seconds, a description ("tooltip") for the pin appears. Note that this will work with any maker pen mode, not just with the Connect mode.
The Connect mode is also used to connect the top part (axle) and the body of Gizmos to other objects (maker pen objects, props, or other gizmos). The process of connecting and disconnecting is very similar to the way pins are connected and disconnected, but you have to aim at the top part and the body of the gizmo and the other object. Note that you can connect maker pen objects but not maker pen shapes, thus, you might have to use the "Done Editing" button to turn a shape into an object. Also note, that you cannot edit maker pen objects once they are connected to a gizmo: you have to disconnect them before you can edit them.
Expert Tip: Two Reasons Why You Cannot Connect Objects
- The most common reasons are 1) you are trying to connect a shape (turn it into a maker pen object by clicking the "Done Editing" button), 2) you can only connect one object to the body of a gizmo.
The third use of the Connect mode is to create transitions between State chips and between a State Machine chip and the first State chip. In this case, the black "bodies" of these chips have to be connected - similarly to how Gizmos are connected.
Configure[]

The "Configure Object" page in the Palette for maker pen shapes.
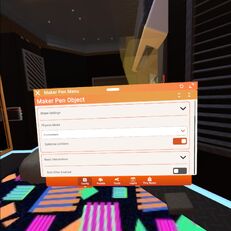
The 2 "Configure Object" pages in the Palette for maker pen objects.
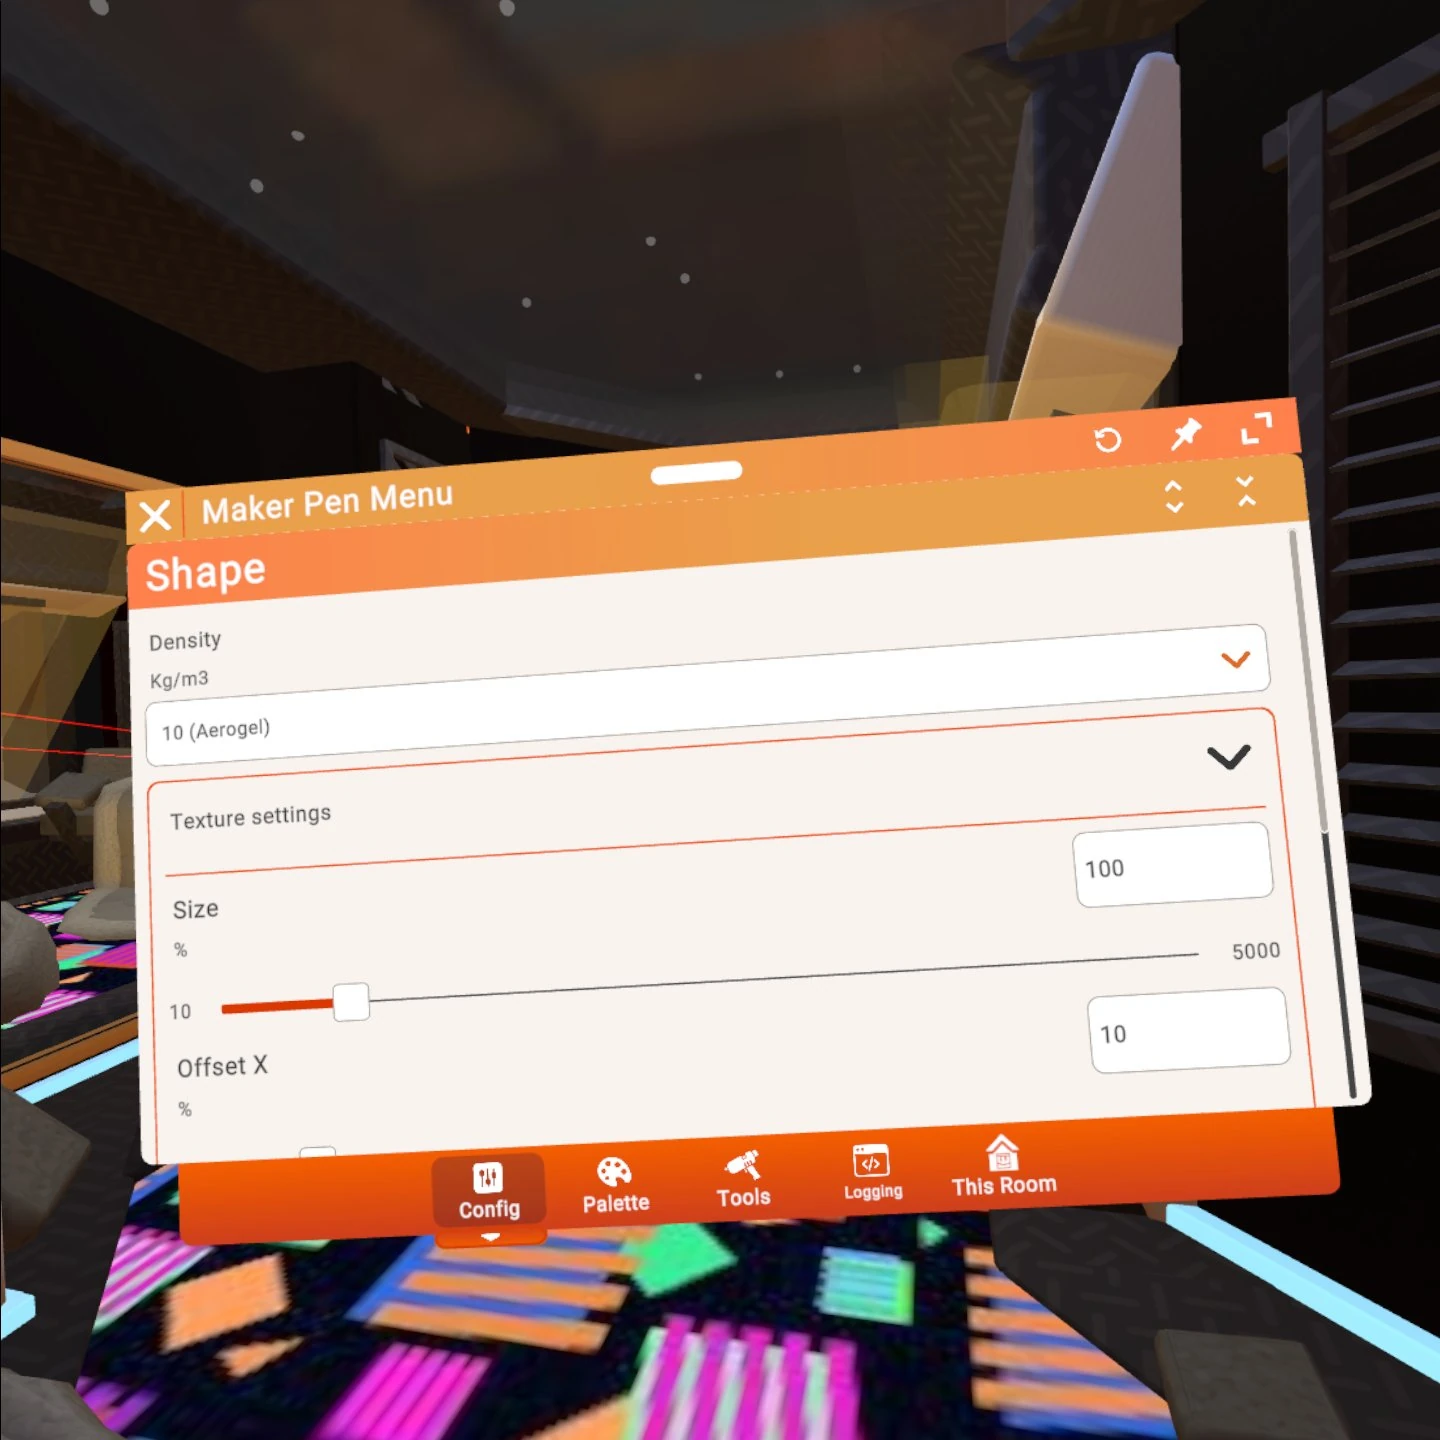
The "Configure" mode allows you to select an object (if in "Object mode"), a maker pen shape (if in "Edit mode"), or a value label of many input pins of Chips, Gizmos, Other Gadgets and Dynamic Props by pointing a yellow ray at it and pulling the trigger. This activates the "Configure Object" pages for the object, shape, or input pin. These pages appear on the Palette.
In the "Configure Object" page for input pins, you can specify a constant input value such that you don't have to connect the input pin to a Variable chip.
In the "Configure Object" page for maker pen shapes, you can specify the mass density of a shape. This density is multiplied with an approximate volume of the shape to compute the mass of the shape. For example, a box of 0.2 m x 0.2 m x 0.2 m has a volume of 0.008 m3. If the density is set to 1000 kg/m3 (approximately the density of water) then the mass of the box is 0.008 m3 x 1000 kg/m3 = 8 kg.
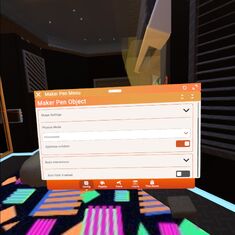
In the "Configure Object” pages for objects, you can activate "Respawn" and specify a delay time which will make the object respawn at its current position after it has been moved away from this position and the specified delay time has passed. The "Physics Mode" allows you to choose between “decoration” mode (objects will not collide and cannot move on their own), "environment" mode (objects cannot move on their own) and "physical" mode (objects can move according to their mass and velocity, etc.).
"Edit Tags?" allows you to add object tags (i.e. text labels) to objects. These can be used by Set Tags Chips, LookAt Gizmos, Trigger Volume, Object Respawners, Respawn Points, and Pickup/Equipment Restrictions of Roles.
If the "Is Grabbable" checkbox is unchecked, players who don't hold a maker pen, cannot grab the object.
If the "Hidden during games" checkbox is checked, the object will disappear when a game is started and reappear when the game is ended. (Usually, this requires a Game Rules chip.)
Expert Tip: How to Configure an Object in "Edit Mode"?
- In "Edit mode", the "Configure" mode opens the configuration for a shape. If you want to access the configuration for an object instead, you first have to exit "Edit mode" (e.g., by tapping "Done Editing" or dropping the maker pen) and then use the "Configure" mode in "Object mode".
Expert Tip: Configuring Props and Gadgets
- With the "Configure" mode, you can activate respawning for props and configure many settings for gadgets and props. You can also decide if an object will be hidden during a game.
Clone[]
The "Clone" button activates a mode that duplicates shapes (when they are in "Edit mode") or objects (in "Object mode"). After activating it, you can point the blue ray from the maker pen at a shape or an object and pull the trigger to duplicate the shape or object. Move the maker pen while pulling the trigger to separate the clone from the original. Alternatively, you can click on one of the handles to create an aligned clone in the direction of the handle - or drag the handle to move a new clone in that direction.
If the shape or object that you are cloning is part of the selected shapes/objects, the whole selection is cloned, and the cloned shapes or objects are selected.
Recolor[]
In "Edit mode", the "Recolor" button activates a mode that changes the color and material of individual shapes. After activating it, you can point the white ray from the maker pen at a shape and pull the trigger to change its color and material to the color and material that is currently selected in the "Shapes" tab of the Palette. In "Object mode", the "Recolor" tool may be used to change the color and material of a whole maker pen object and of props from the Palette, such as the paintbrushes, meeples, beacons, or lights.
Freeze[]
You can freeze an object with the "Freeze" mode: tap the "Freeze" button, then aim with the ray from the maker pen at an object and pull the trigger. Frozen objects are never in "Edit mode" and they do not move. A frozen object cannot be picked up, nor cloned, scaled, moved, rotated, connected, or deleted. However, a frozen object can still be configured and connected to Gizmos. Freezing objects provides a way of protecting objects from accidentally being picked up or being deleted as well as a way to stop other players from modifying an object.
To unfreeze an object, you can use the "Freeze" tool again or double "tap" it with the Select mode.
Expert Tip: Freezing Physical Objects in Mid-Air
- Physical objects fall down when you don't hold them. To freeze them in mid-air, use the Select mode to select them, then move them into position, and then freeze them.
Delete[]
The "Delete" button activates a mode that deletes shapes (when they are in "Edit mode") and objects (in "Object mode"). After activating it, you can point the red ray from the maker pen at a shape or object and pull the trigger to delete the shape or object.
Expert Tip: Deleting Props and Gadgets
- "Objects" include not only maker pen objects but also props and gadgets.
Manipulate[]
The ”Manipulate“ button activates a mode which allows you to stretch and compress shapes in 6 directions: forwards, backward, left, right, up, and down. Point at a shape and pull the trigger to manipulate the shape. This will show six handles at the centers of the faces of the bounding box of the shape. Point at any of these handles, pull the trigger, and drag the handle to stretch or compress the shape. With World Space unchecked, the Scale mode offers similar functionality.
The Manipulate mode can also be used to edit the points of Tubes and Ribbons .
Expert Tip: Rectangles without Bevels
- If you manipulate a Cube to minimum height/length/width, you effectively have a sharp-cornered rectangle. This is useful if you need a perfect rectangle, as current cubes are not perfectly sharp, but have a slightly rounded edge that scales with the shape.
Make Invention[]
The “Make Invention” button allows you to make an Invention. An Invention is an object/group of objects that has been saved as a single group, and can be spawned at will. The process of making an Invention involves selecting the objects you wish to be a part of your Invention, giving your Invention a name, a description, and taking a thumbnail of your Invention. If the room you are in has the “Can Save Inventions?” permission turned off, you will not be able to create a new Invention, nor update an existing Invention. You will also be unable to save an Invention if the selection contains part of an Invention that has been set to “Use Only”.
Undo and Redo[]
The "Undo" and "Redo" buttons allow you to undo almost any action, including Create, Move, Rotate, Scale, Clone, Recolour, Freeze, Delete, and Manipulate. If you make configurations to an object/shape and delete it, those configurations will be restored on undo. However, you cannot undo the configurations themselves. Undoing an edit to a shape will put you into Edit mode for that object. The Maker Pen will store up to 10 undo-able actions. Undoing the deletion of objects with connections will only restore the connections of objects part of the deletion.
Note: You cannot undo an object or group of objects (i.e. an invention) if any of the object(s) are frozen or no longer exist.
Done Editing[]
The "Done Editing" button stops the "Edit mode" for the maker pen object and its shapes that are currently being edited. This puts the maker pen object into "decoration", "environment", "physical" mode, which can be changed with the Configure mode. To activate "Edit mode" for a maker pen object again, use the Edit button. (The Edit button is not available if the maker pen is in "Edit mode" for another object. In this case, you have to activate "Object mode" by tapping "Done Editing" first.)
Former Names of Maker Pen Modes[]
Edit Shapes[]
See Edit.
Wire[]
See Connect.
Settings[]
See Configure.
DONE[]
See Done Editing.
For Advanced Users: Compositions of Maker Pen Objects[]
By sticking sticky maker pen objects to other maker pen objects, you can build complex compositions of objects with a hierarchical structure (similar to a family tree). This hierarchical structure is important when picking and deleting parts of these compositions (as well as for understanding which part of a composition can react to collisions with other objects).
Expert Tip: How to Stick a Sticky Maker Pen Object to Another Maker Pen Object
- In order to stick one sticky maker pen object to another maker pen object, either hold both objects in your two hands, or first stick one of them to the ground, yourself, or another static object before sticking the other maker pen object to it.
The hierarchical structure of each composition consists of exactly one "root object" and zero or more "children objects" to this root object. When you stick one single maker pen object to another single maker pen object (or a built-in object), the former maker pen object becomes the child of the latter maker pen object (or built-in object), which becomes the root of the composition. Each of the "children objects" may be parent to zero or more additional children objects. If you stick a maker pen object to a maker pen object that is part of a composition, the former maker pen object becomes the child of the latter maker pen object, which itself may be the child of another object in the composition.
When you try to pick up a maker pen object that is part of a composition, you will pick up not only the object that is marked by the green silhouette, but also all its children and children of children etc., i.e., all of its descendants in the hierarchical structure of the composition.
All maker pen objects that are stuck to something lose their physical properties. Thus, only the root object of a composition determines the movement and reacts to collisions with other objects.
Expert Tip: Compositions That Can Collide Correctly
- If you want a maker pen object in a composition to react to collisions, the maker pen object has to be the root object of the composition.
Update History[]
| July 6, 2016 | The Marker Pen (previously 3D Pen) is debuted in the Beta test of 3D Charades. |
| July 7, 2016 | Minor bug fixes, such as disappearing pens and rendering issues. |
| July 28, 2016 | Marker Pens now spawn in Dorm Rooms. |